Simplifying OIDC Integration with Keycloak: A Step-by-Step Guide For Local Develeopment
Last month I wanted to have a Rust-app that does some tracking of nutritional intakes and dindn’t want to have any account setup work and I always wanted to use keycloak and Open ID connect in an app. It turned out to be a little harder than I thought to get the setup up and running locally (thanks to many failed tries with authentik). Here is how I got it done in one blogpost. (Hopefully helpful)
Getting things setup for local development
First a docker-compose file to set up a
version: '3.8'

services:
  # THIS SETUP IS PNLY FOR TESTING PRUPOSES, PLEASE DO NOT USE IT IN PRODUCTION
  keycloak:
    image: quay.io/keycloak/keycloak:19.0.2
    command: start-dev
    ports:
      - "8989:8080"
    environment:
      - KEYCLOAK_ADMIN=admin
      - KEYCLOAK_ADMIN_PASSWORD=admin
    volumes:
      - ./keycloak_data:/opt/keycloak/data/h2/:z
the
:zmight throw errors, feel free to delete it
Getting Started with Keycloak
1. Spinning Up Keycloak
First things first, let’s fire up Keycloak using Docker Compose. Just run the following command in your terminal:
docker-compose up
2. Accessing the Admin Console
Now, open up your favorite browser and head over to http://localhost:8989. You’ll be greeted with the Keycloak admin login page. Use the default admin credentials: admin/admin.
3. Creating Your Realm
Think of a realm as a VIP club for your app’s authentication. Create a new realm in Keycloak to isolate your app’s authentication settings from others.

4. Setting Up a Client
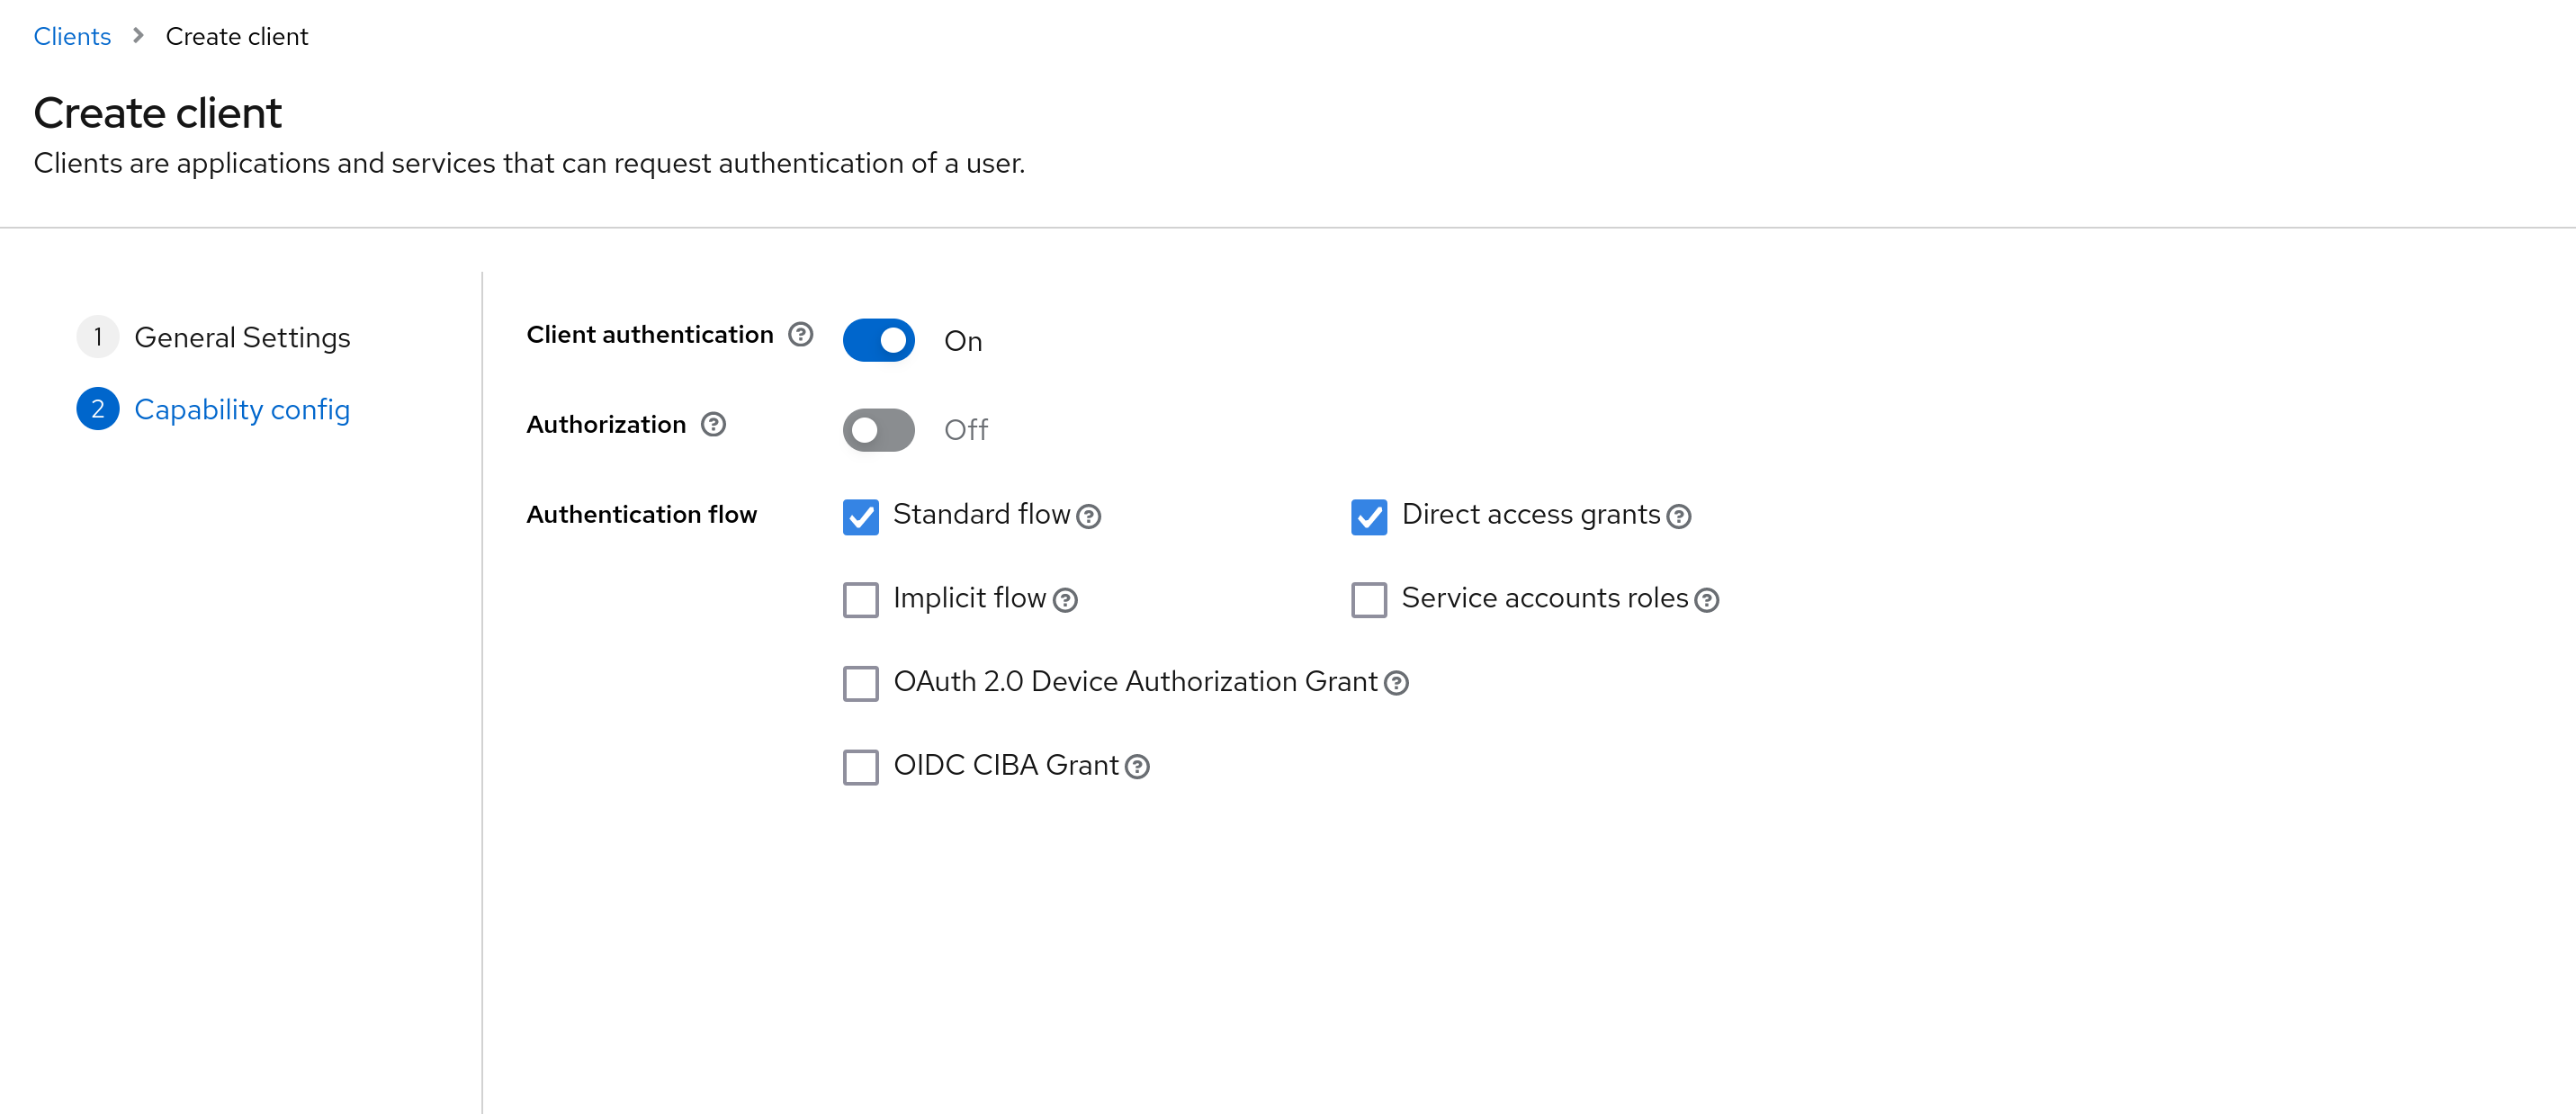
Every app needs a representative, right? Let’s create a client in Keycloak to represent our app. Go to your newly created realm, click on “Clients”, and then hit the “Create” button. Fill in the details.
Also remember your ClientSecret.

 Keep your ClientID somewhere close because you will need it later on.

5. Adding a User Account
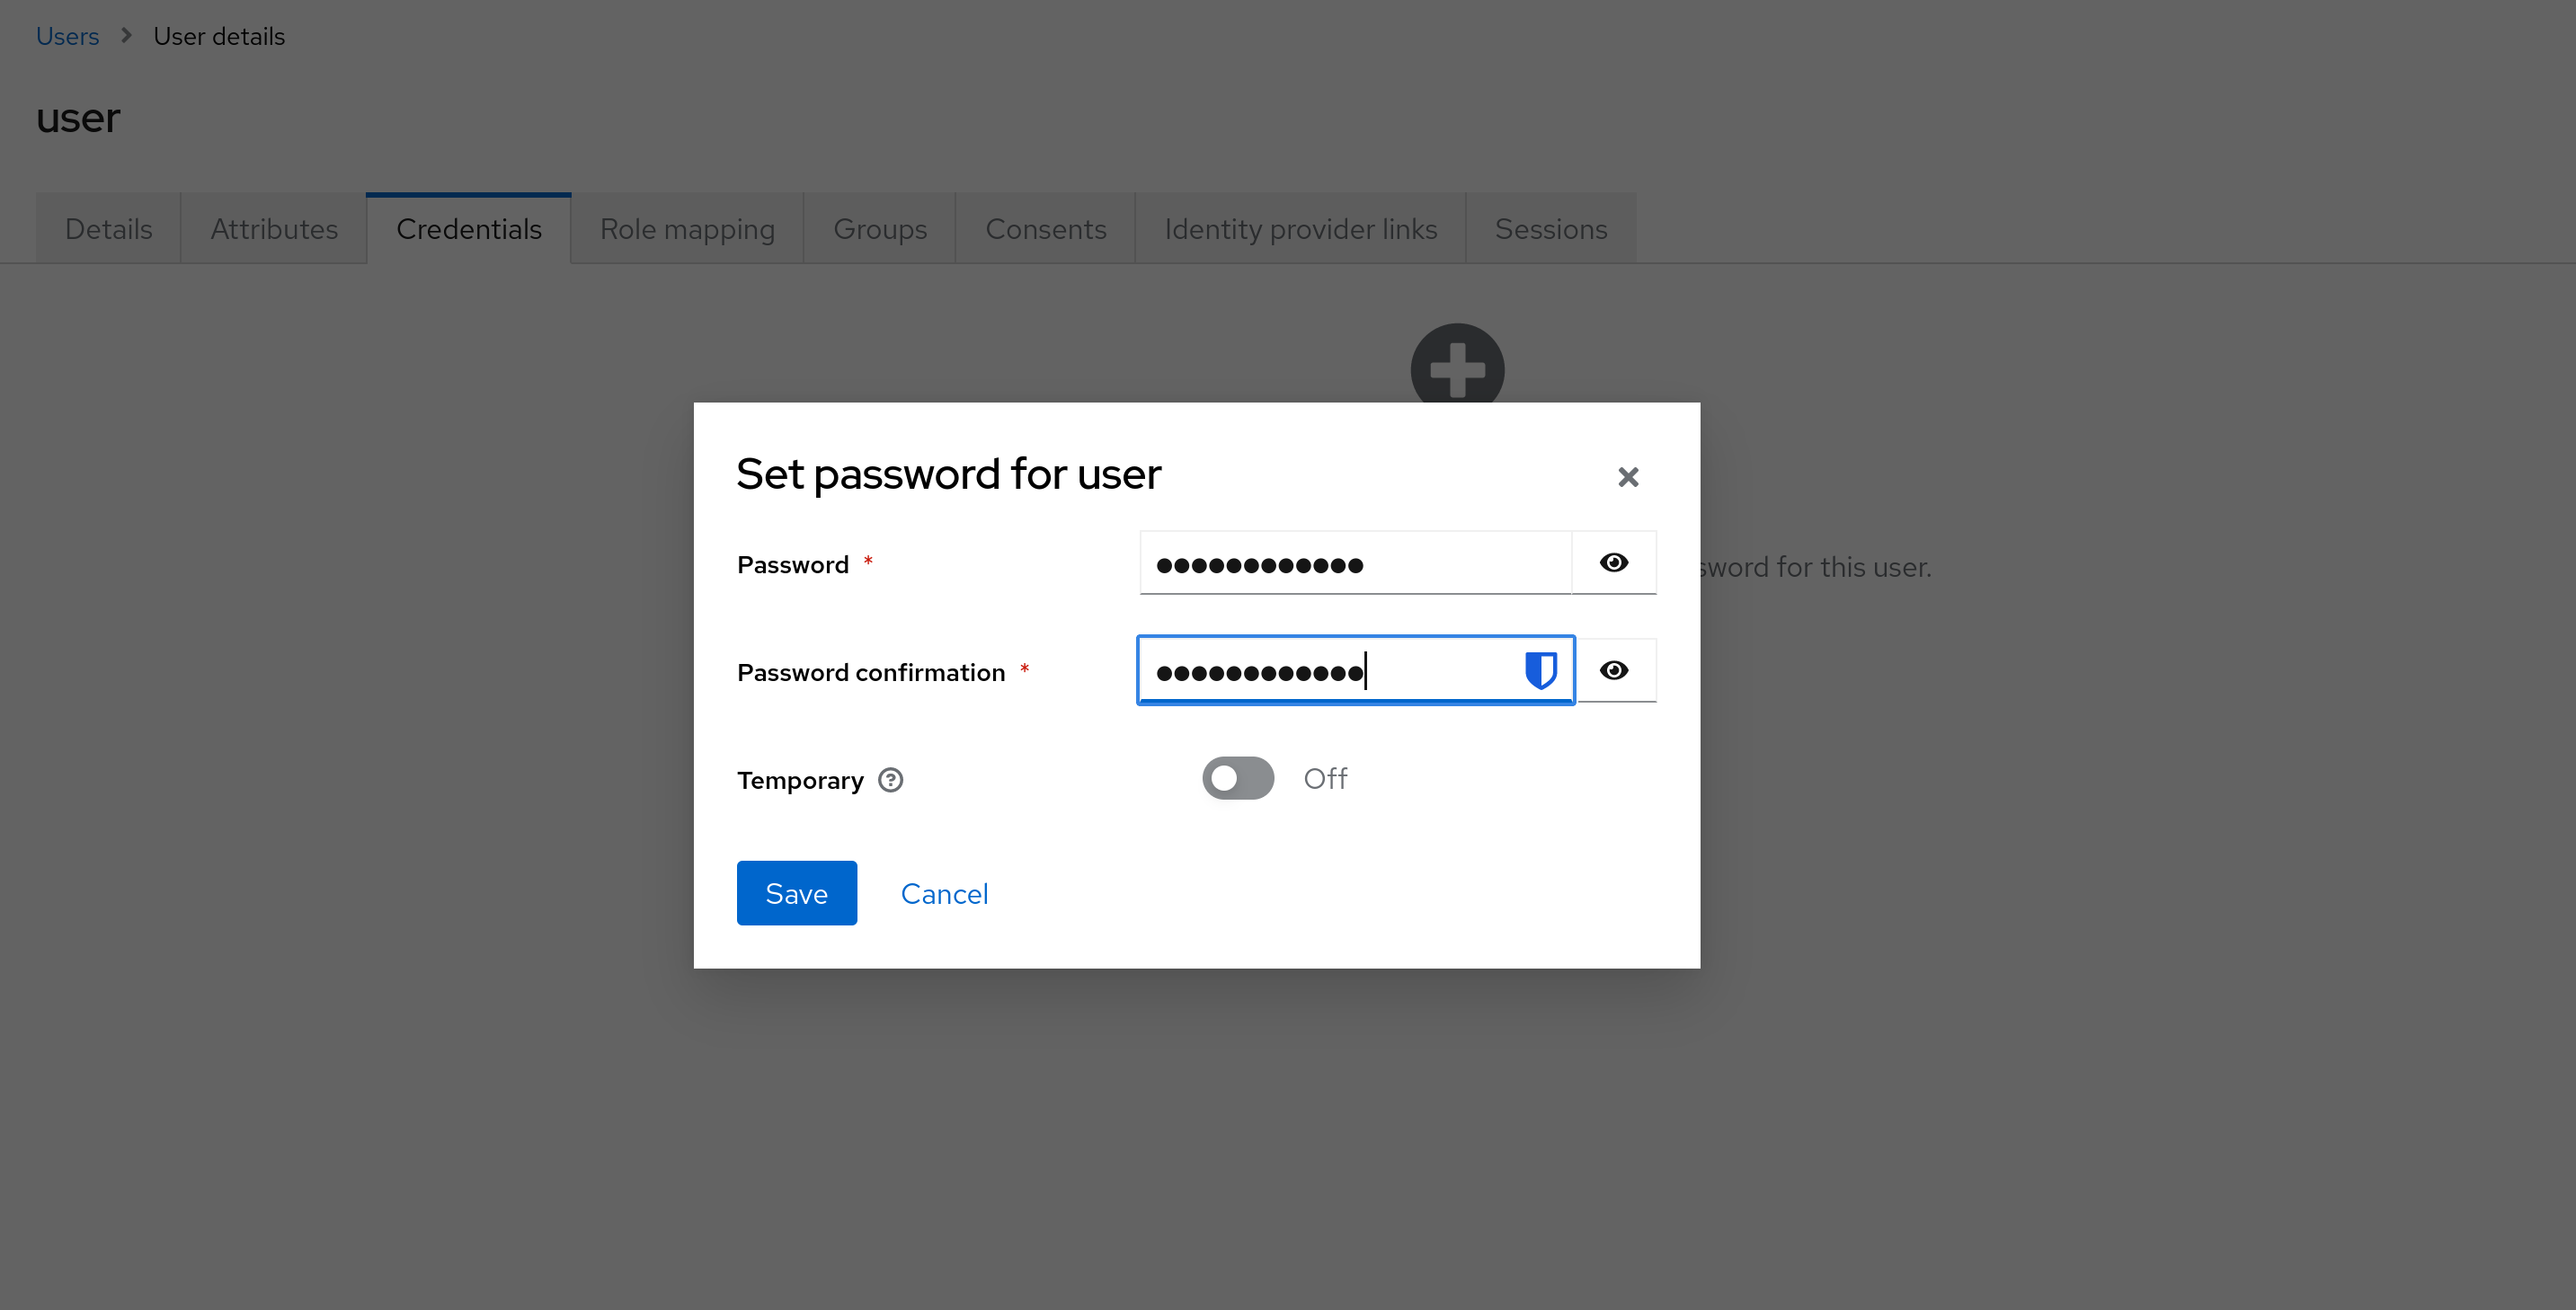
Time to add some users! Go to “Users” in your realm and click on “Add User”. Give them cool usernames and set passwords under the “Credentials” tab.


6. Setting up redirections
Since you want correct redirections for your app yopu should add them in your clients view.

8080 is my apps port, you should use your own
Integrating OIDC with Your App
Now that Keycloak is all set up, let’s integrate it with our app. Here’s how to do it:
- Environment Setup You will need some kind of .env file to let your APP load it or set it the variables directly in your app.
CLIENT_ID=local-dev
CLIENT_SECRET=<secret>
APP_URL=localhost:<your_apps_port>
ISSUER_URI=<your_ip>:<your_port>/realms/local-dev
Set the ISSUER to your Keycloak server’s IP. If you’re running locally, you can grab it using:
hostname -I | awk '{print $1}'
Your OIDC is set up now (for local dev at least) Reminder: This is for testing purposes ONLY and should never ever be used in production. Read the docs for and idea how to run that